Monday, September 23, 2013

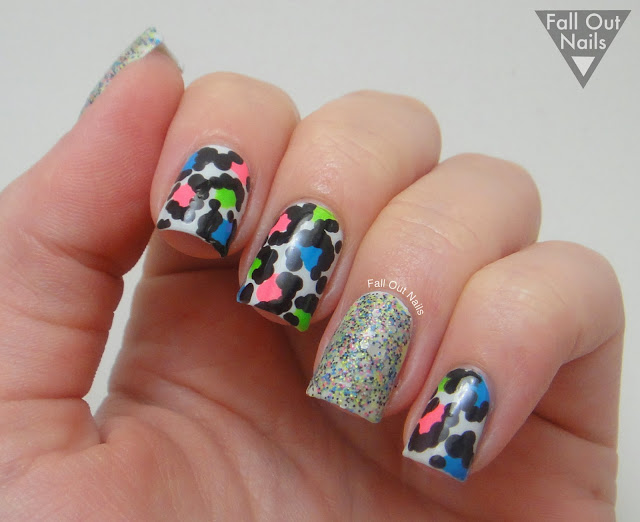
Neon Leopard Print

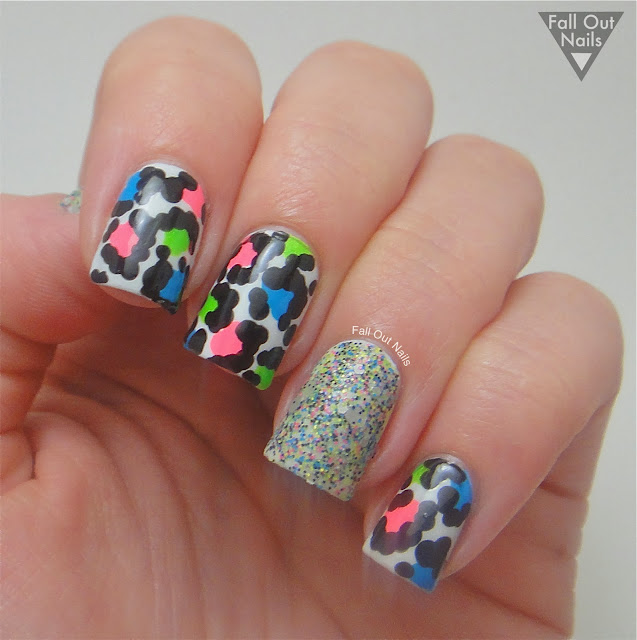
Hey y'all! Here it is, my first attempt at leopard print! I am really happy with the results! (I apologize about the slight blur coming down from some of my nail tips, I think the neons freaked out my camera... )

Neon-leopard-nails-1

I used a larger dotting tool to do the leopard spots (because I figured it would be more forgiving) and I used the same sized dotting tool for the black outline. I was really apprehensive about attempting this look, but I'm so glad I finally did. I even did both hands:

Neon-leopard-nails-2

If you read my last post you already know I love picking colors out of a glitter polish to use on the rest of my nails, and this was no exception! I recently purchased a bottle of Serum No. 5 Lei Down the Law and had to try it out. I love all the neon micro glitters, and that polish also glows in the dark!! Unfortunately, my pictures of the glowy goodness did not come out, but Sarah over at Chalkboard Nails took beautiful pictures you can see here

Neon-leopard-nails-3

I started with two coats of OPI My Boyfriend Scales Walls on all of my nails as the base color.
Here are the other colors I used:
China Glaze I'm With The Lifeguard (green)
Sinful Colors Fusion Neon (pink)
Sinful Colors Savage (blue)
Wet N' Wild Black Creme (black)

Neon-leopard-nails-4

I realized that the beauty of leopard print is that it is supposed to be imperfect. I cannot wait to try more color combinations! Thanks for stopping by! ♥

All polishes purchased by me, all opinions are my own.

Friday, September 20, 2013

Bright + Graphite Skittle Nail Art

Hey y'all! Whenever I am lacking inspiration for nail art, I tend to grab colors that will compliment a glitter polish. Today's post was inspired by Lacquerhead Polish Save The Bows

bright-graphite-skittle-nail-art-1

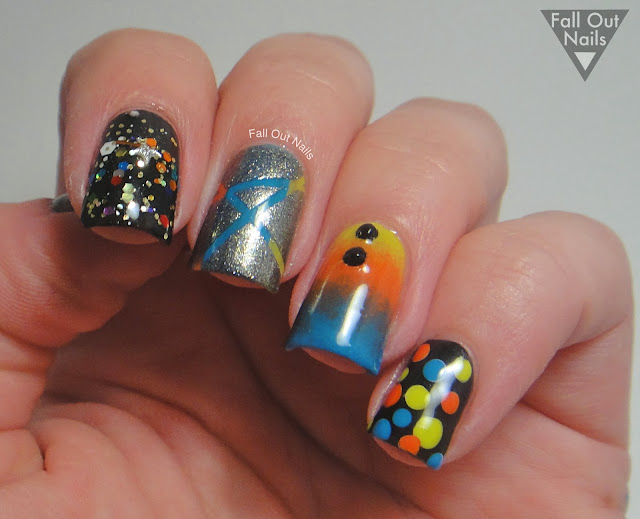
I have had OPI Number One Nemesis (graphite), in my stash for a while and wanted to finally do some nail art with it. The other colors I grabbed were OPI Did It On 'Em (lime), Ulta Son Of A Gun (orange), Sinful Colors Savage (blue).

bright-graphite-skittle-nail-art-2

On my pinky I started with Chanel Black Satin. I dotted white dots first with a dotting tool and  OPI My Boyfriend Scales Walls. Then I dotted on top of the white with colored dots so they would stand out against the black.

My ring finger is a gradient of the lime, orange, and blue colors listed above and two small black accent rhinestones.

For my middle finger, I just used the polish brush from the bottle to paint thick stripes of color and placed a few random pieces of striping tape. After covering the whole nail with Number One Nemesis, I peeled back the tape and was left with a cool laser look.

bright-graphite-skittle-nail-art-3

My pointer is the glitter that inspired the color palate over two coats of Chanel Black Satin

On my thumb I started with NON . Then, I thought it would look cool matted with some shiny stripes, so I attempted that with some striping tape... it was a fail! The contrast between the matte and gloss was not evident enough and looked wonky. However, when I went back over it with topcoat, it made a pretty cool effect! I added some colored rhinestones to tie in the look.

bright-graphite-skittle-nail-art-4


I love getting inspired by glitter polishes because they force me to broaden my horizon and use colors that I may not have been drawn to initially.


I'm pretty happy with how this came out, it was simple and fun to do! Do you ever have a tough time reaching for certain colors? Have a wonderful day! ♥

All polishes purchased by me and all opinions are my own.
Monday, September 9, 2013

Pink Gradient + Texture

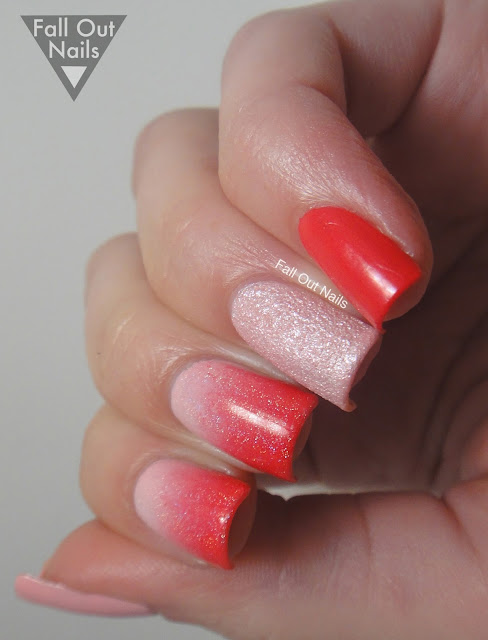
Double posting today!? I guess I'm making up for lost time. ;) So, I think I have mentioned before that I am a girly-girl at heart. I try my hardest to broaden my horizons and appreciate every color in the spectrum, but sometimes you gotta do what makes you feel warm and fuzzy. Enter: a very. pink. mani.

pink-gradient-1

I warned you. My parents were coming into town and it was getting late, so I went with something fairly low maintenance and very me. I used all my favorite pinks! 

pink-gradient-2

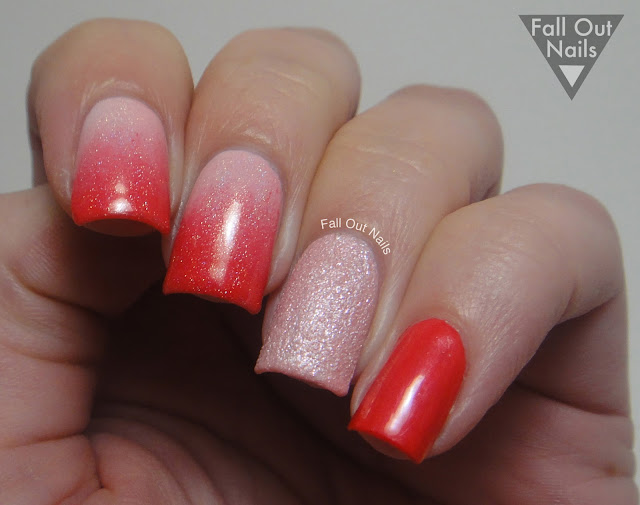
Where do I start? The lighter color of the gradient and my thumb are OPI Pink Friday, the darker color in the gradient and my pinky are OPI A Definite Moust-Have, and my ring finger is OPI Pussy Galore (Liquid Sand). I topped my gradient with Digital Nails Spectraflair

pink-gradient-3

I personally love how this turned out. I really like the holographic gradient look and can't wait to try it matted! 

pink-gradient-4

Are you a fan? Too much pink for your eyes? I wanna know! 

All products purchased by me, all opinions are my own.

Quick Swatch - Colores de Carol

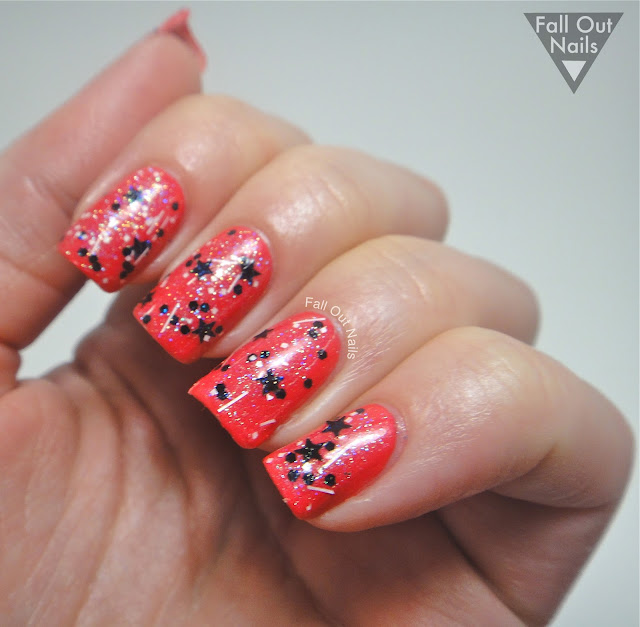
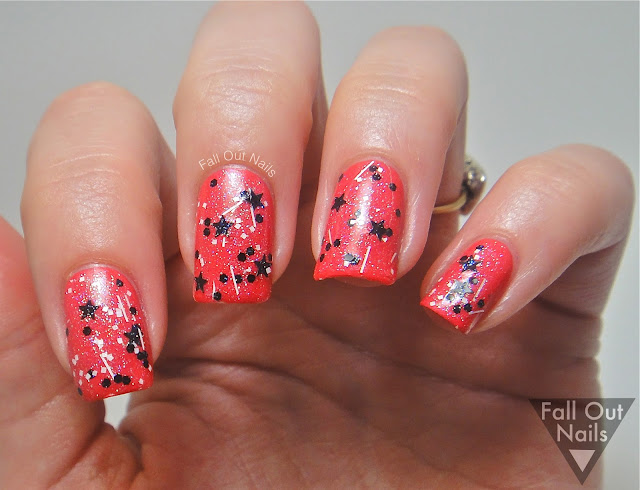
Ahh it feels good to be typing up a post again! I've missed my blog dearly! I have been going through serious family stuff but I want to spend my morsel of free time doing what makes me happy! This crazy-cool polish from Colores De Carol is called Hero In Disguise. It is a sheer gray crelly with medium crimson hexes, small gold hexes, and black stars. Also in this polish is an impossible-to-photograph blue shimmer!

hero-in-disguise-1

I used two coats of Hero In Disguise over Essence Grey-t To Be Here. I really love the name of this polish, it is very fitting! 

hero-in-disguise-2

hero-in-disguise-3

I am sorry this post is pretty short but I am really hoping to get back to blogging! Have a wonderful day!

All products purchased by me, all opinions are my own.

Tuesday, August 13, 2013

'Merica.

Hey ya'll, I've got a patriotic/Texas themed mani today. This skittle mani is red, white, and blue!

red-white-and-blue-skittle-nail-art-1

I started out with OPI My Boyfriend Scales Walls on all my fingers except my thumb. Then, starting with my pinky, I placed red, white, and blue rhinestones in a row. On my ring finger, I used a dotting tool dipped in Ulta Non-Stop Red and Orly Shockwave. On my middle finger I used the same red and blue polishes, and placed a star sequin from Mash. My pointer has two coats of Hare Married to the Monarchy.

red-white-and-blue-skittle-nail-art-2

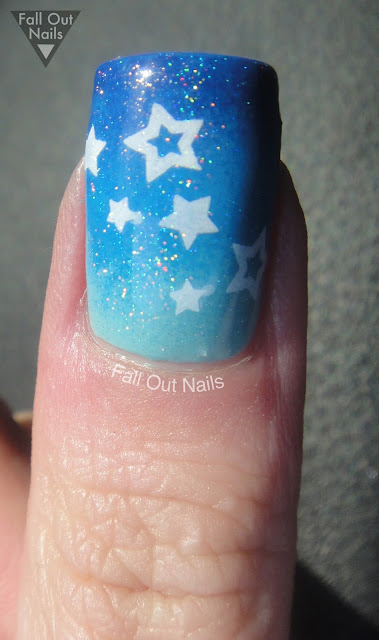
On my thumb I did a gradient with China Glaze For Audrey and Orly Shockwave. I then stamped on some stars using Nailzcraze plate #NC 02 and Konad White. I topped it all off with Digital Nails Spectraflair for a sparkly look I couldn't stop staring at! Here it is in direct sunlight!

red-white-and-blue-skittle-nail-art-3

I loved wearing this mani, and since Texas colors are also red, white, and blue, I can wear it year-round! Thanks for stopping by, have a lovely day!

All polishes purchased by me, all opinions are my own.

Tuesday, July 23, 2013

My favorite OPI showCASED! (pun intended)

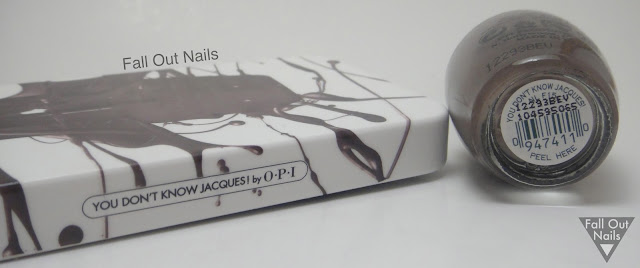
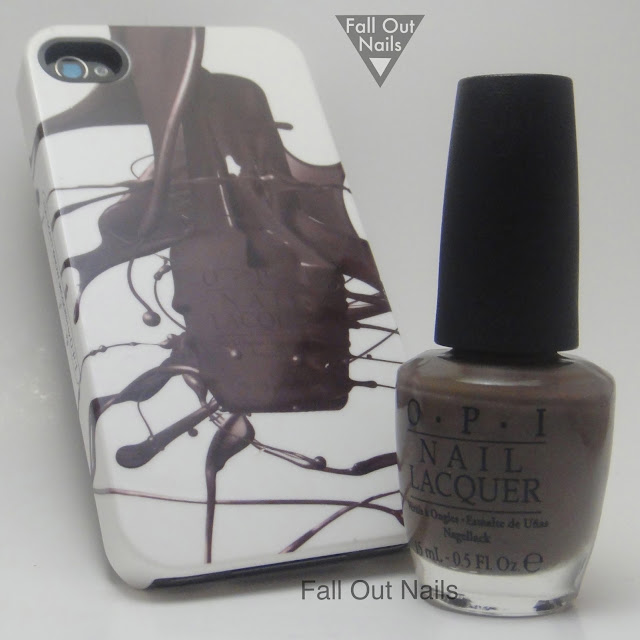
Alright y'all this month has been ROUGH. No lie. I promise I've got lots of pics saved up now, editing and posting them was the difficult part. I made a pretty sweet purchase not too long ago: a phone case sporting one of my all-time favorite OPI colors You Don't Know Jaques! Have you seen this lovely color!? It's not new, and I've been a fan for about 4 years now. It was part of a 2008 collection La Collection de France. When I saw that there was a case available with this color I knew I had to have it. Okay here is the bottle of polish next to the case:

you-dont-know-jaques-case-1
you-dont-know-jaques-case-2

Of course I gotta have it on my nails too, so heres a neutral look I played around with:

You-dont-know-jaques-nail-art-1

So, this is my 2nd attempt at striping tape... a bit time consuming but so worth it! The off white is of course another must-have: OPI My Vampire Is Buff. Here's the bottle, case, and mani all together:

you-dont-know-jaques-case-3

You can tell the bottle, case, and my actual nails painted with this polish all vary a bit in shade, but even still I freaking love this gray-taupe color. I also took some pictures in odd lighting throughout my house just for perspective.

you-dont-know-jaques-case-4
you-dont-know-jaques-case-5

Just in case you are wondering, I bought my case from here.

Okay y'all heres where things get rough... after a day or two I wanted to add to this look before I removed it with some nail art techniques I have been meaning to attempt... and let's just say you can tell its my first swing at floral art... 

You-dont-know-jaques-nail-art-2
You-dont-know-jaques-nail-art-3

Oh. Holy. Buckets. Im super critical of my own work so for me the flowers are a hot mess. But on the plus side they at least look like flowers...I think.

OPI My Vampire Is Buff is dotted on my pointer and middle fingers, I used China Glaze For Audrey and Sinful Colors Savage for the flowers, and I used China Glaze I'm With the Lifeguard, and NYC High Line Green for the leaves. My pinky is Milani Teal

Next time I try floral art I am going to let each layer dry completely before continuing with a new color. Other than that its just a steady hand and practice I think! Thanks for reading, do you own You Don't Know Jaques too? Have a great day! 

All products mentioned were purchased by me, all opinions are my own.

Monday, June 24, 2013

Enchanted Zebras! (Concert Nails)

I am beyond excited to share that I recently got to see my favorite band (yep, you already know) Fall Out Boy a couple of weeks ago! I wanted to go all out with some crazy FOB nail art, but my sister drove from out of town to join me and I wanted to spend time with her! So I went with a combo that was rocker + girly. Behold Enchanted Zebras by Starrily.

Starrily-Enchanted-Zebras-1

Its so sparkly! I jumped on the Black + White glitter obsession bandwagon long ago so this polish was a must have for me! I layered two coats of Enchanted Zebras over 3 thin coats of OPI A Definite Moust Have. I store most of my glitter polishes upside down in my helmer, and by doing so no fishing for glitter was required.

Starrily-Enchanted-Zebras-2

I just want to mention as far as darker pinks go, this is a favorite for me. I am considering a backup bottle.

Starrily-Enchanted-Zebras-3

Of course I had to take some outdoor pics to capture all the sparkle!

Starrily-Enchanted-Zebras-outdoors-1

Starrily-Enchanted-Zebras-outdoors-2

What do you think? Were my nails rocker enough? Whats that, you want bonus concert pics? If you insist... 

fall-out-boy-concert-1
I captured Andy through the tree :)
fall-out-boy-concert-2
And Andy again drumsticks in the air!
fall-out-boy-concert-3
PETE!!! 
Okay thats enough, ya'll have a lovely Monday!

Disclaimer: All polishes were purchased by me, all opinions are my own. I am in no way affiliated with Fall Out Boy. 

Wednesday, June 19, 2013

Hare Polish! Hooky at the Hamlet + Party Palace

Hey Ya'll, I hope everyone had a wonderful week! I have two Hare Polishes to share with you, both from the Spring 2013 Last Queen of France collection. For both polishes I used three thin coats with no undies. There is a slight visible nail line, but it didn't bother me.

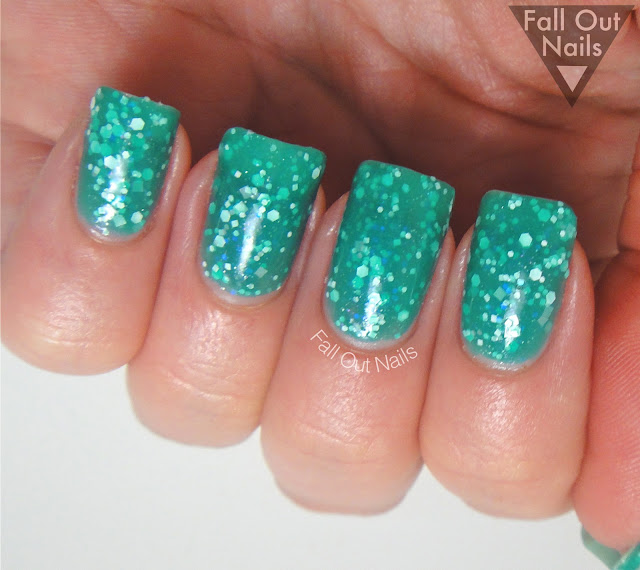
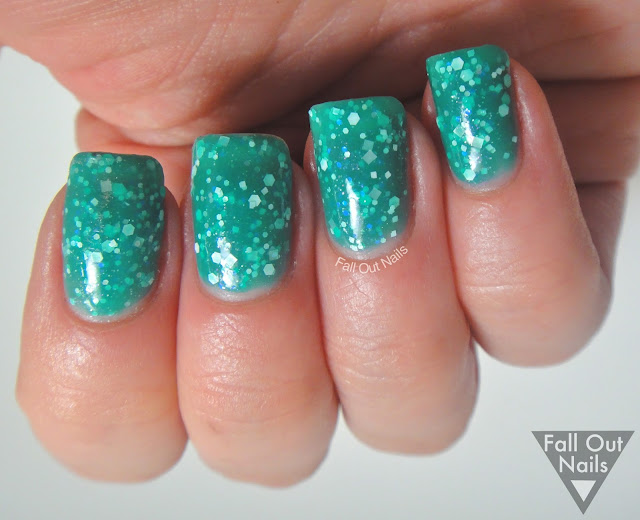
The first shade I have for you is Hooky at the Hamlet. It is a greenish teal jelly with lots of different white glitters and blue-purple shimmer.

Hare-Polish-Hooky-at-the-Hamlet-1

I tried my best to get a color accurate shot of this beautiful shade, and check out that blue shimmer! Somebody at work said my nails reminded them of toothpaste and I have to agree! :)  This was a super fun color to wear, I wish I had taken a few photos in the sunlight. You can really see the blue on my ring finger in this next one... 

Hare-Polish-Hooky-at-the-Hamlet-2

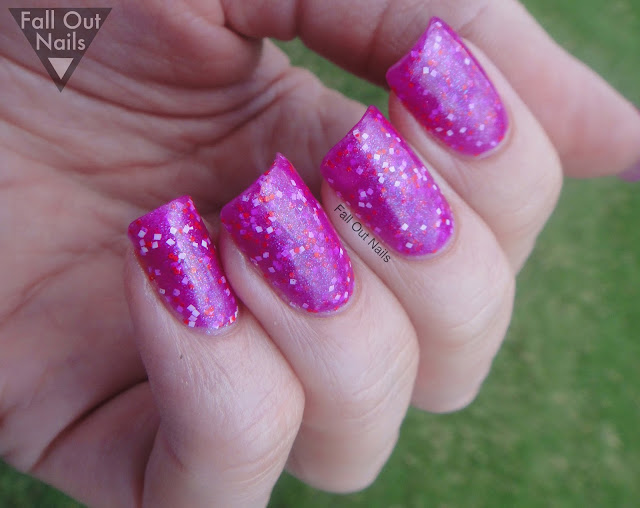
The other polish I have today is Party Palace. It is a bright fuchsia jelly with red-orange hexes, white squares, fuchsia micro glitter, and blue shimmer. Thats a whole lot packed into one little bottle if you ask me! 

Hare-polish-party-palace-indoors-1

My boyfriend said this one reminded him of a Good & Plenty candy box. This color was also hard to photograph for color-accuracy and the darker photos are more accurate.

Hare-polish-party-palace-indoors-2

Hare-polish-party-palace-indoors-3

And guess what? This time I remembered to take pics outside too! The first one is in the shade, you can really see those microglitters now!

Hare-polish-party-palace-outdoors-1

And this next one is in the sun:

Hare-polish-party-palace-outdoors-2

I just realized it is embarrassing how pale I am for mid-June in Texas! Did I blind you? I hope you enjoyed this post, I really love these complex polishes!

Disclaimer: All products were purchased by me and all opinions are my own.

Wednesday, June 12, 2013

Recent Mani Recap: CrowsToes + HARE polish

*crickets* Hellooo out there! ... Haha, if you're following my blog already, thank you for bearing with me these past few weeks. I was promoted at work, and the training/studying has taken a toll on my free time! I still managed to keep my nails polished and photographed, so I would like to share what I've been sporting while I have been away.

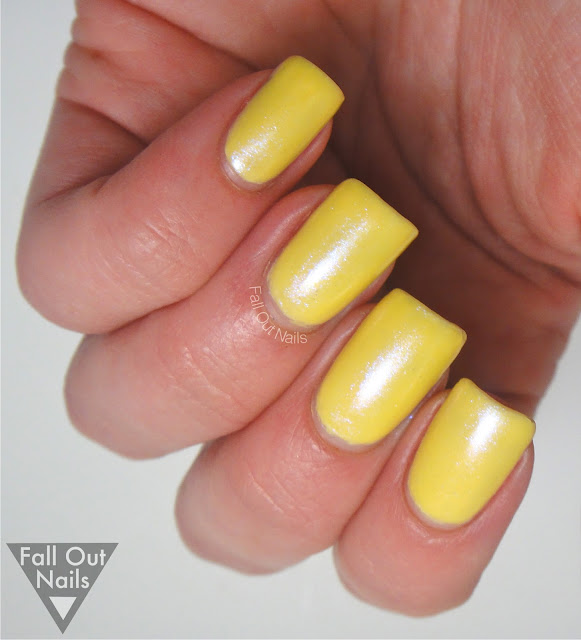
Shown below is CrowsToes Toxic Buttercup from the 2013 spring THIS collection. It is so cool in person, I tried my best to capture the shimmer that shifts pink to yellow. I layered it over Sinful Colors Unicorn because I thought it was going to be sheer, but the undies were not necessary and just caused too many layers. You can build this polish to opacity in three coats.
crows toes toxic buttercup

Next is another CrowsToes polish, also from the spring THIS collection, called L'il Miss Sunshine.

crows toes lil miss sunshine

 This one I probably should have used undies. As I built this beauty up I wasn't very patient so it dried funny near my tips. Still though it is beautiful in person. 3 coats shown.

crows tows lil miss sunshine 2

Now I have a couple polishes from Hare Polish to share, the first one is Bury the Hatchetfish from the Illuminated Life Fall 2012 collection. This is two medium coats of BTH over one coat of Ulta On Taupe Of The World, and Mash Matte top coat.  I tried my best to capture the beautiful blue glitter! Oh, and learn by burn, matte topcoats can shrink your polish! Be warned. To prevent, use a normal top coat and then matte away!

Hare polish bury the hatchetfish

One more attempt to capture the sparkle! 

Hare Polish Bury the Hatchetfish 2

Finally, I have a very layered look. It's going to be a challenge explaining exactly what I did here, I think list form will be easier to follow:
1) I started off with two coats of Sinful Colors Cinderella, which is a pastel blue with subtle pink shimmer. 
2) Then, I layered two thin coats of Hare Polish Rococo Grandeur from the 2013 The Last Queen of France collection. Rococo is a light pastel blue jelly with pink and gold glitters and subtle blue shimmer. 
3) I wanted an extra pop because I was planning on mattifying, so I grabbed Hare Polish Teen Queen, also from 2013 TLQOF collection. Teen Queen is a clear base with pink and blue glitter. I applied two thin coats. 
4) I finished it all with OPI Matte Top Coat, by far the best matte I have tried. 

hare polish teen queen and rococo grandeur

Whew! Fun and girly, reminded be of an easter egg! I'm excited to be blogging again, I have really missed it! Have a wonderful day!

Disclaimer: All polishes were purchased by me, and all opinions are my own.
Friday, May 31, 2013

Two Firsts, Stamping + Striping


Hello all you beautiful people! I apologize, I know it has been over a week since my last post, I've been so busy. Bad blogger! I do hope this was worth the wait because I have TWO firsts to share! Lets break it down!

stamping striping glitter nail art 1

Let's start with the easy stuff first, shall we? Base + Glitter: I've got OPI My Vampire Is Buff as a base on all my nails. I added two coats of Hare Polish Own Your Opulence on my pointer and middle fingers; they sort of inspired the rest of the look.

stamping striping glitter nail art 2

A little more advanced, Striping: This was literally my first ever attempt at using striping tape. Yes, it takes patience to perfectly lay down the tape. I have read on many nail blogs that there is a learning curve, so I armed myself with tweezers and extra lengthy cuts of tape. I was surprisingly happy with the result. I think since I read so many horror stories over time about the difficulty I was timid to try out striping tape for a while, but I am so glad I did.

stamping striping glitter nail art 3

It is not as hard as some people say it is. Just breathe and place, it is tape after all, you can move it around! If you haven't tried striping tape before, be warned: you need to let your polish dry for a bit after removing the tape, or the top coat will streak your work. The stark black, Wet n Wild Black Creme, against the bone white base was a daring first choice I realize, as I did re-do one of my thumbs. Oh well, let's learn from each other!

stamping striping glitter nail art 4

And finally, difficulty "I can't believe I can (sort-of) finally do this," Stamping: I have half-heartedly attempted stamping in the past but never succeeded in a full-on look until this time. I have been practicing stamping on pretty much every mani just before removal. It was so nerve-racking stamping for the first time! Clearly the attempt is far from perfect, but I was happy to at least capture what I was going for. AKA I didn't fail!  I used Nailz Craze plate #NC02 and Konad Black special polish.

stamping striping glitter nail art 5

stamping striping glitter nail art 7


I really like how the whole look came together. As soon as I purchased HARE polish Own Your Opulence I knew it would go great with OPI's MVIB. After I had finished the mani and wore it for a few hours, I realized just how many different colors make up this glitter polish! There are pastel pink, grayish-blue, and yellow hexes, along with gold hexes and micro glitters, and black squares and hexes! A LOT going on! Part of me wanted to go back and add color to my other nails, but the glitter in this polish can speak for itself!

TGIF! Have a wonderful day!

Disclaimer: All polishes purchased by me and all opinions are my own.