Monday, September 23, 2013

Neon Leopard Print

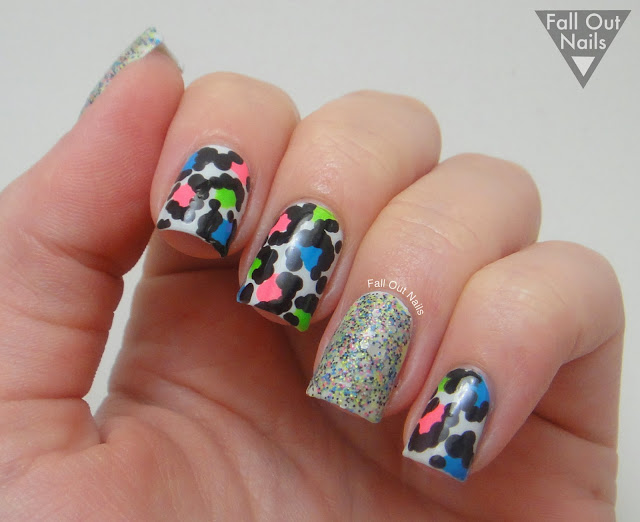
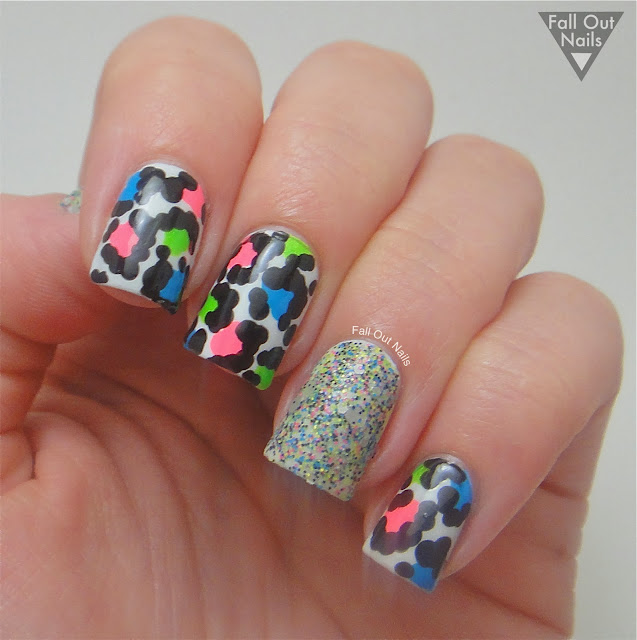
Hey y'all! Here it is, my first attempt at leopard print! I am really happy with the results! (I apologize about the slight blur coming down from some of my nail tips, I think the neons freaked out my camera... )

Neon-leopard-nails-1

I used a larger dotting tool to do the leopard spots (because I figured it would be more forgiving) and I used the same sized dotting tool for the black outline. I was really apprehensive about attempting this look, but I'm so glad I finally did. I even did both hands:

Neon-leopard-nails-2

If you read my last post you already know I love picking colors out of a glitter polish to use on the rest of my nails, and this was no exception! I recently purchased a bottle of Serum No. 5 Lei Down the Law and had to try it out. I love all the neon micro glitters, and that polish also glows in the dark!! Unfortunately, my pictures of the glowy goodness did not come out, but Sarah over at Chalkboard Nails took beautiful pictures you can see here

Neon-leopard-nails-3

I started with two coats of OPI My Boyfriend Scales Walls on all of my nails as the base color.
Here are the other colors I used:
China Glaze I'm With The Lifeguard (green)
Sinful Colors Fusion Neon (pink)
Sinful Colors Savage (blue)
Wet N' Wild Black Creme (black)

Neon-leopard-nails-4

I realized that the beauty of leopard print is that it is supposed to be imperfect. I cannot wait to try more color combinations! Thanks for stopping by! ♥

All polishes purchased by me, all opinions are my own.
Friday, September 20, 2013

Bright + Graphite Skittle Nail Art

Hey y'all! Whenever I am lacking inspiration for nail art, I tend to grab colors that will compliment a glitter polish. Today's post was inspired by Lacquerhead Polish Save The Bows

bright-graphite-skittle-nail-art-1

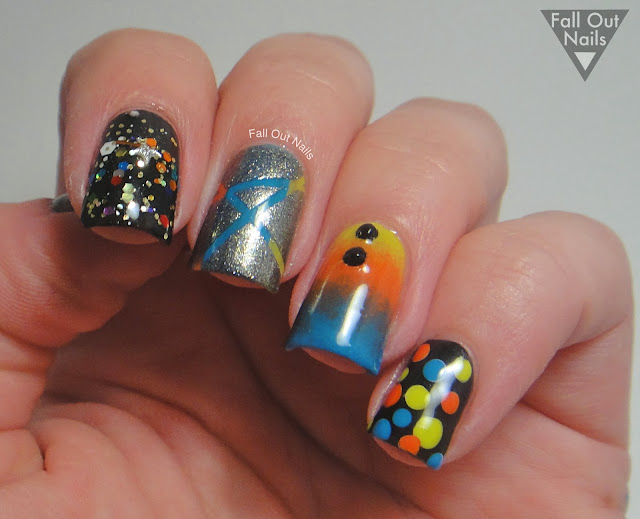
I have had OPI Number One Nemesis (graphite), in my stash for a while and wanted to finally do some nail art with it. The other colors I grabbed were OPI Did It On 'Em (lime), Ulta Son Of A Gun (orange), Sinful Colors Savage (blue).

bright-graphite-skittle-nail-art-2

On my pinky I started with Chanel Black Satin. I dotted white dots first with a dotting tool and  OPI My Boyfriend Scales Walls. Then I dotted on top of the white with colored dots so they would stand out against the black.

My ring finger is a gradient of the lime, orange, and blue colors listed above and two small black accent rhinestones.

For my middle finger, I just used the polish brush from the bottle to paint thick stripes of color and placed a few random pieces of striping tape. After covering the whole nail with Number One Nemesis, I peeled back the tape and was left with a cool laser look.

bright-graphite-skittle-nail-art-3

My pointer is the glitter that inspired the color palate over two coats of Chanel Black Satin

On my thumb I started with NON . Then, I thought it would look cool matted with some shiny stripes, so I attempted that with some striping tape... it was a fail! The contrast between the matte and gloss was not evident enough and looked wonky. However, when I went back over it with topcoat, it made a pretty cool effect! I added some colored rhinestones to tie in the look.

bright-graphite-skittle-nail-art-4


I love getting inspired by glitter polishes because they force me to broaden my horizon and use colors that I may not have been drawn to initially.


I'm pretty happy with how this came out, it was simple and fun to do! Do you ever have a tough time reaching for certain colors? Have a wonderful day! ♥

All polishes purchased by me and all opinions are my own.

Monday, September 9, 2013

Pink Gradient + Texture

Double posting today!? I guess I'm making up for lost time. ;) So, I think I have mentioned before that I am a girly-girl at heart. I try my hardest to broaden my horizons and appreciate every color in the spectrum, but sometimes you gotta do what makes you feel warm and fuzzy. Enter: a very. pink. mani.

pink-gradient-1

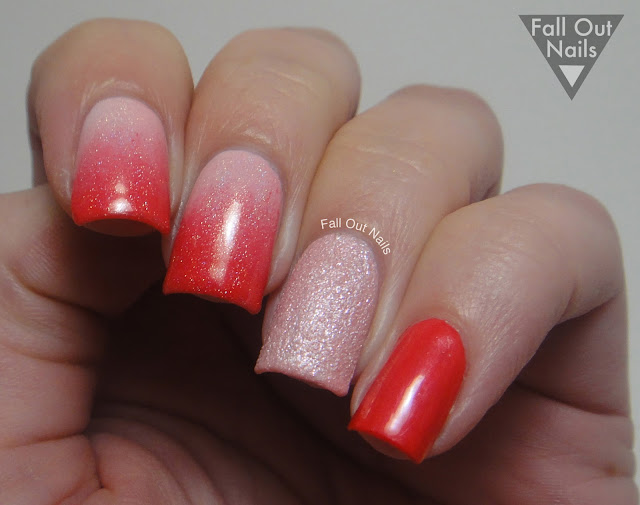
I warned you. My parents were coming into town and it was getting late, so I went with something fairly low maintenance and very me. I used all my favorite pinks! 

pink-gradient-2

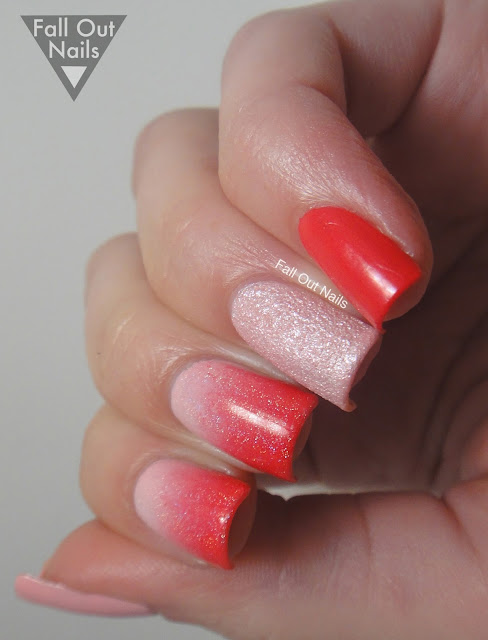
Where do I start? The lighter color of the gradient and my thumb are OPI Pink Friday, the darker color in the gradient and my pinky are OPI A Definite Moust-Have, and my ring finger is OPI Pussy Galore (Liquid Sand). I topped my gradient with Digital Nails Spectraflair

pink-gradient-3

I personally love how this turned out. I really like the holographic gradient look and can't wait to try it matted! 

pink-gradient-4

Are you a fan? Too much pink for your eyes? I wanna know! 

All products purchased by me, all opinions are my own.

Quick Swatch - Colores de Carol

Ahh it feels good to be typing up a post again! I've missed my blog dearly! I have been going through serious family stuff but I want to spend my morsel of free time doing what makes me happy! This crazy-cool polish from Colores De Carol is called Hero In Disguise. It is a sheer gray crelly with medium crimson hexes, small gold hexes, and black stars. Also in this polish is an impossible-to-photograph blue shimmer!

hero-in-disguise-1

I used two coats of Hero In Disguise over Essence Grey-t To Be Here. I really love the name of this polish, it is very fitting! 

hero-in-disguise-2

hero-in-disguise-3

I am sorry this post is pretty short but I am really hoping to get back to blogging! Have a wonderful day!

All products purchased by me, all opinions are my own.